Thursday, May 28, 2009

Wild About Wings -- Thrifty Thursdays

Chicken wings are a great party food or snack for the family. You can make batches and batches in advance, then keep them warm in a chafing dish, or re-heat in the oven. They are also inexpensive (downright cheap) and versatile in that there is an endless array of marinades, sauces and dips to keep the munching interesting. You can fry chicken wings, bake them, or my favorite, charcoal grill them.

But before you can get creative with chicken wing recipes, you need to prepare the wings. If you've ever ordered Buffalo Chicken Wings at a restaurant you know you are never served a whole wing. Here's the technique for preparing wings at home.

1. Take a sharp knife or meat cleaver and cup off the wing tip.

chicken wing recipes

2. Cut wing at the elbow joint.

chicken wings


3. Discard wing tips or save to make chicken stock. The remaining two parts are ready for your favorite Chicken Wing recipe.

chicken wings

A Book for Wing Lovers!
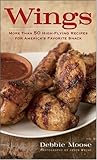
Wings -- More Than 50 High-Flying Recipes for America's Favorite Snack by Debbie Moose.
It's hard to beat chicken wings when you need satisfying snacks to frugally feed a crowd, and it's hard to beat this book for coming with inspiring new ways to prepare them. You'll find 65 tempting recipes, most illustrated by gorgeous color photographs that highlight the ingredient's infinite versatility. Author Debbie Moose starts by showing how easy it is prepare perfect fried, baked, or grilled wings before delving into the recipes. You'll find classics like the legendary Buffalo Wings, but then she takes off on a world wide gustatory tour tour that includes influences from Italy to India and nearly everywhere in between. There are also plenty of recipes for sauces, dips, and salsas that can transform the humble chicken wing into extraordinary bites that will keep party guests coming back for more. Click here for more information about this book or to find out how to get a copy.

Thrifty Thursdays is a blog event created by my fried Amanda Formaro from Amanda's Cookin' blog. I've agreed to participate, so look for a frugal themed post here each Thursday. In addition to reading my posts, be sure to visit Amanda's blog for a round-up of all the thrifty home and cooking tips and recipes that came in this week from folks around the blogosphere.

Thursday, May 21, 2009

Cooking Dried Beans and Legumes - Thrifty Thursdays

Many people are baffled with how to cook dried beans. Relax, it's easy and beans and legumes are some of the healthiest foods you can eat. And if you cook your own dried beans, they are also one of the least expensive foods you can eat. Buying dried beans, as opposed to canned, has far less environmental impact too -- no wasteful packaging and manufacturing and less fuel to transport to market.

Don't worry if your recipe calls for canned beans. Know that dried or canned beans will work interchangeably in recipes.

Here are some more tips to help you cook better with beans:
  • Fresher dried beans will cook faster than older dried beans, so use the cooking times as a very general guideline. Taste the beans for tenderness early and often during the cooking process.

  • Because bean cooking times can vary so widely from batch to batch, it's best to pre-cook dried beans before using in recipes.

  • Cooking Method I -- Place beans in a large pot and cover with cold water. Bring to a boil, reduce heat to a simmer. Cover and cook until beans are tender.

  • Cooking Method II -- Cover beans with cold water and soak overnight or for at least 6 hours. Drain and place in clean water, bring to a boil, reduce to a simmer and cook until tender.

  • beansQuick Soak Method: Cover in cold water, bring to a boil. Turn off heat and let soak for 2 hours, then simmer until tender.

  • Before cooking, rinse the beans and pick through them, removing any small stones that sometimes get mixed in and throwing out any shriveled or discolored beans.

  • Even though they may be dried, the fresher the bean the better -- for flavor and for the amount of nutrients.

  • Store dried beans in covered plastic food containers.

  • After cooking beans, divide into portions and refrigerate leftovers in their own liquid for up to 4 days or in the freezer for 3 months.

  • Reheat cooked beans in the microwave, on the stovetop or even in the oven.

  • To cook beans in a slow cooker, soak as usual, then place beans in slow cooker, over with water or other liquid by about an inch or so. Turn it on low and check in about 6-8 hours (or about 4-5 for high).

  • To cook beans in a pressure cooker, click here for complete directions and suggested cooking times for various types of beans.
Favorite Recipes Using Dried Beans
Now that you know how to cook dried beans, let's put them to tasty use!
Did You Know?
Garbanzo Beans and Chickpeas are the same thing!


Thrifty Thursdays is a blog event created by my fried Amanda Formaro from Amanda's Cookin' blog. I've agreed to participate, so look for a frugal themed post here each Thursday. In addition to reading my posts, be sure to visit Amanda's blog for a round-up of all the thrifty home and cooking tips and recipes that came in this week from folks around the blogosphere.

Wednesday, May 13, 2009

Use Up Those Ripe Bananas - Thrifty Thursdays

Bananas can be a great bargain, especially if they're on the verge of getting too ripe. Grocery stores regularly mark such fruit down to ridiculously low levels. If you see some almost too ripe bananas that aren't marked down, ask the produce manager -- he or she will usually do so on the spot.

So what can you do with too ripe bananas? Peel and freeze them to use in smoothies. The frozen banana helps make the smoothie thick without having to add ice which can water down the flavor. Be sure to peel the bananas before freezing, as it's almost impossible to do so later. Plastic zipper bags are wonderful for storing individual portions of frozen bananas, making Smoothie making a snap!

So what else to do with those healthy, delicious bananas before they turn completely brown? Try one of these recipes at the links below:
Banana Bread and Variations
Without a doubt banana bread is one of the world's favorite ways to use ripe bananas. We have a recipe to fit nearly everyone's tastes and dietary requirements.
  • Banana Poppyseed Muffins - These tempting muffins are like banana bread in a smaller more portable package, perfect for lunch boxes or a quick morning snack on the go. They freeze well too.
  • Strawberry Macadamia Nut Banana Bread -- This great recipe by John Winkler of San Pedro, California, was a finalist in the 1997 Oxnard, California Strawberry Festival's Berry Off Cooking Contest.
  • Guatemalan Banana Bread -- Here's a unique twist on banana bread from Guatemala featuring coconut milk, raisins, and cashews.
  • Alabama Banana Bread -- This dense rich banana bread is great cold or warmed. It freezes exceptionally well.
  • Healthy Banana Bread -- Leanne Ely created this healthy recipe the whole family will love. Perfect for a healthy lunch box or brown bag addition, it keeps in the fridge for up to 10 days.
  • Gluten Free Banana Bread -- Not only is this tasty banana bread perfect for folks with gluten sensitivities, it's also vegan.
  • Whole Grain Banana Walnut Muffins -- Perfect for the kids' lunch box or as an after-school treat, these moist mini muffins make good snacking anytime.

Thrifty Thursdays is a blog event created by my fried Amanda Formaro from Amanda's Cookin' blog. I've agreed to participate, so look for a frugal themed post here each Thursday. In addition to reading my posts, be sure to visit Amanda's blog for a round-up of all the thrifty home and cooking tips and recipes that came in this week from folks around the blogosphere.

Monday, May 11, 2009

Iced Tea or Seafood Lemons

This simple yet elegant presentation for lemons served with iced tea or seafood dishes not only keeps the seeds out of the tea or off the dish, they smell terrific and add a decorative touch to the table.

I've garnished the lemons in the photo with fresh mint sprigs, to be served with iced tea. If the lemons were accompanying fish or other seafood, you should use an herb that complements the seafood recipe instead. Fresh Basil, rosemary or thyme often work well.

For Each Bundle You Will Need:
1/2 fresh lemon, cut horizontally
4 1/2 " square of cheesecloth
small piece of ribbon or twine
fresh herbs springs (optional)

If you are using fresh mint sprigs for a garnish, tie a mint sprig onto the middle of the small length of ribbon with a slip knot.

Center a horizontally cut lemon slice onto the square of cheesecloth. Gather the end up so the cloth is tightly against the cut surface of the lemon and tie with a piece of ribbon or twine.

Wednesday, May 6, 2009

How to Make Tinted Sugar or Coconut - Thrifty Thursdays

Sugar tinted in a rainbow of colors is a handy item to have in the kitchen for adding a special decorative touch to cakes, cookies and other desserts. But why spend exorbitant prices buying colored sugar when you can easily make your own for much less. Doing it yourself also broadens your color palette considerably as you can custom blend the perfect shades to meet your needs. And keep in mind that the identical technique also works for tinting coconut!

All you need are some small, heavy duty, plastic zipper bags, some sugar (or coconut) and some food colors. Paste colors work best, as they help keep the sugar from getting overly soggy and it's easier to mix, but you can get away with a drop or two of liquid if that's what you have on hand. Place the desired amount of sugar or coconut in the plastic bag, add a small dab of color on a toothpick. Close the bag and mix and shake until color is evenly distributed.

The secret to beautifully colored sugar is to take your time and make sure that all of the color is evenly distributed. Keep working the color through the sugar until you are sure there are no more concentrated little clumps left.

The other thing to keep in mind is that food coloring is concentrated, so start with a little bit and add more later if needed. The color can be deceiving when making colored sugars, in that you won't get the true hue until all the color is COMPLETELY incorporated into the sugar. The more you mix, the darker it gets.

Don't worry about it too much, though. If the color becomes darker than you wanted, it's simple to fix. Just add more sugar or coconut and continue to mix.

Related Links

Thrifty Thursdays is a blog event created by my fried Amanda Formaro from Amanda's Cookin' blog. I've agreed to participate, so look for a frugal themed post here each Thursday. In addition to reading my posts, be sure to visit Amanda's blog for a round-up of all the thrifty home and cooking tips and recipes that came in this week from folks around the blogosphere.

Saturday, May 2, 2009

The Basics of Tempura

Sorry I have been so quiet this last week. I had a major computer crash -- got a virus and lost everything. But am back up and running! Now on to today's post.

Tempura is a fun food to cook right at the table, Japanese style. If you have a fondue pot (an easy item to find at garage sales and thrift stores if you don't), you already have everything you need.

A Japanese classic, tempura consists of foods that are battered and deep fried. Tempura is limited only by your imagination. Traditional foods included a variety of vegetables and seafood such as shrimp or scallops, but don't be afraid to experiment and such western staples as chicken or even cubes of beef. The fried food can then be dipped in a traditional Japanese dipping sauce (click here for recipe) or dipped in salt. In Japan you will often be served salt that's mixed with various seasonings. You can do this at home by using coarse sea salt and mixing in curry powder, hot chiles or paprika to taste. In Japan each plate has tiny piles of the various seasoned salts on it.

It is important to make your batter just before frying, so make sure the oil is hot first. Always sift your flour first and use ice water. Stir only enough to mix the batter, for if you over-beat the batter you will develop the gluten in the flour and it won't work properly. Tempura batter should be lumpy.

Test to make sure the oil is hot enough before frying your foods. To do this, drop a drop of batter into the oil, if the drop quickly floats to the surface, the oil is hot enough. If it takes its time in floating, let the oil heat longer.


Cut food for frying into bite sized pieces. Below are some photos showing how to cut Japanese eggplant for tempura.

Cutting Eggplant Cutting Eggplant

If desired, you can cut fancy little stars in your mushrooms caps. While this is not necessary, it is traditional in Japan. The photos below will show you how.

Cutting Mushrooms Cutting Mushrooms

Cutting small slits along the under curve of a peeled shrimp will keep the shrimp from curling while it cooks. The photo below will show you how.

Cutting Shrimp

Below are some of our favorite foods for tempura. Feel free to use your imagination and add your own.

  • Shrimp
  • Scallops
  • Calamari
  • Chicken Breast Cubes
  • Steak Cubes
  • Mushrooms
  • Asparagus
  • Japanese Eggplant
  • Green Beans
  • Squash

To cook tempura, spear a piece of food on a bamboo skewer or fondue fork, dip into the batter cup, then deep fry it in the oil filled fondue pot. The length of cooking time depends on what is being cooked. Seafood will take less time (2-3 minutes) than chicken or most vegetables. 4-5 minutes will usually be the most time you'll need to leave anything cook.

Like most fondue meals, tempura provides a relaxed, slow, social dinner. People cook, eat, and converse. What better way to spend an evening?

Click here for my Tempura batter and dipping sauce recipes.

Friday, April 24, 2009

Book Feature and Recipes -- Biggest Loser 30-Day Jump Start

If you need to lose weight and start getting your life under control - food and health-wise, this easy to follow 30 day plan will start you on the way.

The book is formatted so you can take it one day at a time, giving you a menu plan and exercises to do each day for thirty days. At the end of that period you'll look better, feel better, and have established some healthy habits that you can continue to lose more weight or maintain a happy healthy way of living. Throughout the book are Trainer Tips from Jillian Michaels and Bob Harper, along with insight from actual show contestants who have been there.

Even if you have a lot of weight to lose and/or are extremely out of shape, this book will give you the tools to actually tackle the problem in small steps that you can handle, so you can start moving forward and do something about it. Supposedly this was the plan the contestants who were sent home from the ranch on the television show were given to follow.

If you're already working out regularly, the workout plan may be too light for you (I know I already work out more than the book recommends), so be assured the contestants you see on the actual show are doing MUCH more than what you'll be expected to follow on this plan. But if you're just getting started, this will give you a practical guide to help you on your way to better fitness. The exercises don't require any special equipment save a couple of light dumbbells, and can be done anywhere.

The best part of this book, however, is the recipes. Cheryl Forberg, who serves as the nutritionist for the show and co-wrote this book, was a classically trained chef before she became a dietitian. Her recipes are amazing! Low calorie, low fat, high fiber, and healthy...and delicious! She gets maximum flavor out of the quality ingredients she uses. Several of the recipes in this book (like the muffin recipe linked to below) have become everyday staples in my kitchen. The food is easy to prepare and especially for "diet" fare is unbelievably tasty and satisfying . You get three balanced meals plus two snacks a day.

I loosely followed the program and am now down 14 pounds. The plan actually gave me more food than I'm used to eating on other weight loss plans, so I was never hungry, and it was just the kick start I needed to break through some bad habits I'd slipped back into and get back to a healthy lifestyle.

For more information about this book, or to order through Amazon.com, click here.

Sample Recipes -- Check This Book Out!

More Biggest Loser Fun!
Click here for Cheri's interview with Biggest Loser trainer Bob Harper.

Wednesday, April 22, 2009

The Fit Freezer -- Thrifty Thursdays

If you like frozen dinners like those made by Lean Cuisine®, Weight Watchers® or Jenny Craig®, you'll love these homemade alternatives. The meals offer the speed and convenience of going from microwave to table in minutes. More importantly, they cut down the urge to cheat, as they give you a portion controlled amount of food that takes the guesswork out of dieting.

With the recipes and instructions in this article, you can stock your home freezer with delicious homemade, portion controlled low fat foods that have many advantages over their store bought counterparts:

  • More Wholesome - A lot of commercially prepared foods are loaded with unnecessary sodium, sugars, preservatives and other ingredients that you don't need. By making your own meals at home, you control what goes into the foods you eat and you can season them according to your own tastes.
  • Less Expensive - The prepared diet meals you buy at the supermarket are pricey and those sold at commercial diet centers like Jenny Craig cost even more. By preparing your own meals at home, you can easily save 50%-75% or more.
  • Greater Flexibility - When you're counting fat and calories, every little bit counts. Who wants to waste calories on foods you don't really like? When buying prepackaged diet meals, you're unfortunately stuck with whatever combos the manufacturer has chosen - you might like the entrée but not the side dish. Maybe you'd prefer high fiber, nutrient rich brown or wild rice instead of white rice. By making your own meals, you can mix and match entrées and side dishes to create low calorie, low fat healthy meals that suit your individual tastes and needs.
  • Saves Time - As each recipe makes several meals, you can plan to cook several recipes in a single session and have enough food in the freezer to last for weeks. Get together with your diet buddy or a group of health conscious friends and have a "cooking party" -- you can all eat well, stay on your diets, and have a fun day preparing meals together.


Cooking for the Freezer Basics:
If you've never prepared foods for the freezer before, don't worry. It's easy. And don't worry if you only have a small, fridge-top freezer -- if you pack carefully you can easily fit a month's worth of meals in the space you have. In order to prevent freezer burn, which occurs when large ice crystals form during the freezing process, cool foods completely before freezing (cool for no more than 1 hour at room temperature -- otherwise cool in the refrigerator to prevent foods from sitting in the danger zone for bacteria growth between 40°F and 140°F).

Unless you like playing dinner roulette, be sure to label your freezer dinners, not only so you'll know what inside, but also in order to use the oldest foods first. Permanent markers, like Sharpies® work great -- you can even write directly onto aluminum foil or freezer bags. Or you might want to tape an index card on the package with heating instructions (especially handy if other family members will be doing the reheating).

Packaging Freezer Meals:
You probably already have some containers in your pantry that will work -- small glass dishes that can go from freezer to microwave or conventional oven. These containers work great for freezer cooking, although most people don't have enough of them. Keep your eyes peeled for sales at department stores or you might even get lucky and pick some up dirt cheap at garage sales or thrift stores.

Another option is to purchase some of the great containers made by Glad® or Ziplock® (you can use and re-use them over and over again), as they are designed to go from freezer to microwave. But don't limit yourself. Get creative -- any food-grade containers will do, like margarine or whipped topping tubs, Tupperware® or whatever other small containers you might have in the house.

If you plan on cooking your meals in a conventional oven, foil take-out containers like those used by restaurants are terrific (again, I use and re-use mine multiple times). They are quite inexpensive when bought in quantity at a local restaurant supply house.

Of course some recipes, like the French Bread Pizzas, need no more packaging than a tight wrap in aluminum foil. Others you can carefully place in a zippered freezer bag, freeze flat, then place in a baking dish when you are ready to heat them.

For lots more information on what does and doesn't freeze well, click here for the FabulousFoods.com Freezing Primer.

Fit Freezer Recipes
I'll be adding to our archives of Fit Freezer recipes as time goes on. In the meantime, here are a few of mine and a few from Holly Clegg (who has a terrific Trim and Terrific freezer cookbook, click here for details) to get you started.
Thrifty Thursdays is a blog event created by my fried Amanda Formaro from Amanda's Cookin' blog. I've agreed to participate, so look for a frugal themed post here each Thursday. In addition to reading my posts, be sure to visit Amanda's blog for a round-up of all the thrifty home and cooking tips and recipes that came in this week from folks around the blogosphere.

Friday, April 17, 2009

Cooking with All Things Trader Joe's - Book Feature

I believe there has long been a need for a Trader Joe's cookbook, so much so in fact that I approached the Trader Joe's company about the idea several years ago. They wanted no part of it, citing the reason that they don't always keep the same items in stock at all times. While that may be true, they keep plenty enough of them, and often when one goes out, something similar takes its place.

Authors Deana Gunn and Wona Miniatihad the same idea for a cookbook, but they didn't let TJ's reticence keep them from pursuing the project. They wrote and produced a Trader Joe's cookbook on their own. And they've done a fabulous job. I couldn't have done it better myself!

Each and every recipe in this book can be made entirely from ingredients typically found at your local Trader Joe's store. This alone should cut down on the amount of running around you do when grocery shopping. Like the merchandise at Trader Joe's, the fare is modern and current -- the kinds of food you and your family will run to the table for. Full color photos accompany each recipe, enticing you to head out for TJ's and start cooking.

While the recipes we chose for samples can be made from ingredients that you can get at Trader Joe's or other stores (so as not to leave out those FabulousFoods.com readers who are not lucky enough to have a Trader Joe's store nearby), know that many of the recipes in the book utilized Trader Joe's signature brand items -- such as sauces, salsas, and prepared foods. As the authors say, having a Trader Joe's nearby is like having your own chef staffed prep kitchen.

Recipe chapters include:
A Few of Our Favorite Things; Appealing Appetizers; Soups, Salads, and Light Meals; Main Meals; On the Side; Delicious Desserts and Daring Drinks; Begin with Breakfast; Bachelor Quickies; Trader Joe's Store Locations.

Sample Recipes from Cooking with All Things Trader Joe's

For more information about Cooking with All Things Trader Joe's or to order through Amazon.com, click here.

Wednesday, April 15, 2009

Easy Anytime Salsa -- Thrifty Thursdays

Why buy store made salsa when it so much less expensive to make your own. If you have a food processor it takes just minutes (dare I say seconds) to make. OK, minutes if you count the time it takes to assemble the ingredients.

My nephew Richard introduced me to the fact that you can actually make a darn good salsa with canned tomatoes – so good, most people will never suspect it’s not fresh. Ive since come to learn that most restaurants use this trick for making their salsas.

Of course, if your garden is overflowing with gorgeous ripe tomatoes, by all means use them. But the rest of the year good canned tomatoes are always preferable to inferior fresh ones. One more bonus -- canned tomatoes actually contain more healthy lycopene than their fresh counterparts. Go figure. So if you find a good sale on canned tomatoes, stock up and you can whip this salsa recipe together anytime.

Extra Frugal Tip Alert!
Save the juice from your canned tomatoes and use it to make a batch of Spanish Style Rice (click link for recipe).

Ingredients
1 can, 28 ounces, whole tomatoes
1 can, 14.5 ounces, whole tomatoes
1 can, 7 ounces, diced green chiles
1 medium-large onion, about 1 3/4 cups coarsely chopped
1 to 2 fresh jalapeno chiles, stemmed, seeded and chopped, about 1-3 tablespoons chopped
1 small bunch cilantro, stems removed, coarsely chopped, about 3/4 cup chopped
salt and pepper to taste
Instructions
Place the tomatoes and chiles in a colander, squeeze out as much juice as possible and set aside for at least 15 minutes to drain well. Press out additional moisture before continuing with recipe. Be sure to catch the juice if you plan on making Spanish Style Rice.

Transfer the drained tomatoes and chiles, along with the remaining ingredients to the bowl of a food processor. Pulse about 6 to 10 times – mixture should be well chopped and combined but still have some small chunks for texture. Serve as a dip for tortillas chips or anywhere else you'd use fresh salsa.

Variations, Substitutions and Embellishments
  • Don’t have any fresh jalapenos on hand? Substitute pickled sliced jalapenos, like those typically served on nachos.
  • A quarter or half of a pureed chipotle chile (or more to taste) will add smoky flavor and additional spicy heat.
  • Garlic lovers will want to add a clove or two of minced garlic to the mix.
  • Cooking for kids or wimps? Leave out all the jalapenos and definitely do not add the chipotle.

Thrifty Thursdays is a blog event created by my fried Amanda Formaro from Amanda's Cookin' blog. I've agreed to participate, so look for a frugal themed post here each Thursday. In addition to reading my posts, be sure to visit Amanda's blog for a round-up of all the thrifty home and cooking tips and recipes that came in this week from folks around the blogosphere.

Tuesday, April 14, 2009

A Unique American Regional Cuisine Experience - The Door County Fish Boil

DOOR COUNTY, WISCONSIN, USA -- What do you get when you cross the primitive tribal elements of a huge cast iron communal cooking pot set over a blazing raging hot fire with down home Midwest sensibility and hospitality? Answer – the Door County, Wisconsin fish boil.

What began as an economical way to feed large, hungry crowds of lumberjacks and fishermen has evolved into a bonafide culinary tourist attraction and Door County is the only place you can regularly experience it.

Steaks of delicate whitefish taken from the waters of Lake Michigan which surrounds the peninsula of Door County, along with small red potatoes, onions, and sometimes corn on the cob are placed in perforated metal baskets and lowered into heavily salted boiling water.

The “Boil Master” oversees the entire operation, stoking and feeding the wood fire under the huge black cast iron cauldron to keep the water rolling and adding the various ingredients at just the right moments to insure that everything is cooked just the right amount to retain flavor and texture.

Depending on the time of year you visit Door County, you may or may not want to stand outside to view the entire process (can you tell I experienced my fish boil in December?), but either way be sure to get everybody outside in plenty of time for the “boil over.”

For the Fish Boil's spectacular fiery finale, the Boil Master douses the already robust fire with a hefty supply of kerosene, thereby causing the eruption of a flaming volcano, which is ultimately doused by the water boiling over from the cauldron above. Aside from serving as a must-get Door County photo op for your vacation album, the boil over does serve a practical purpose. As the fish cooks, the oil from their flesh rises to the top of the cauldron. When the water boils over, it takes this layer of oil floating at the top with it, leaving food behind that’s perfectly cooked, but never greasy or oily.

Zen-like in its simplicity – the salted water during cooking and a drizzle of drawn butter at the table provide the only seasoning, the Fish Boil’s wholesome ingredients nonetheless satisfy today’s diners just as they did the working Door County residents of yesteryear.

You’ll find restaurants throughout Door County offering Fish Boils year round (although in off season, they are only offered on the weekends). Most offer a complete meal including side dishes and a slice of Door County Cherry Pie to complete your dinner, like they do at the White Gull Inn where I went for the Fish Boil experience. This elegant historic (built in 1896) hotel and restaurant in the beautiful bayside town of Fish Creek also makes a great choice as a home base for a romantic Door County getaway.

Click here for more of my articles on the fun things to do, see, and eat in Door County, Wisconsin.
Practicalities

Be sure to make reservations to attend a Fish Boil in advance
, especially during the high seasons of summer and fall when they frequently sell out. During the high seasons most restaurants offer several seatings per evening. Fewer restaurants offer Fish Boils in winter, and usually only on weekends so be sure to check schedules in advance to avoid disappointment.

The White Gull Inn and Restaurant
is located at 4225 Main Street in Fish Creek, WI 54212; call 920-868-3517 or visit their website at www.whitegullinn.com.

To find other restaurants offering Fish Boils
, click to the Door County Visitor’s bureau website at www.doorcounty.com/dine/fish-boils.aspx.

For trip planning, contact the Door County Visitor’s Bureau at 1015 Green Bay Rd. Sturgeon Bay, WI 54235 call 800-52-RELAX or 920-743-4456 or click to www.DoorCounty.com.

(Photo at top of post by Jon Jarosh.)

Sunday, April 12, 2009

The 10 Best Things To Do With Leftover Easter Eggs

Okay. Easter is over. A good time was had by all. There were chocolates and grand style feasting, and of course, Easter Eggs. Lots and lots of Easter Eggs. So many Easter Eggs. Never have you and your family turned out such masterpieces of Easter art. You just couldn't stop!

But what are you left with after the bunny goes home? A couple of extra pounds from all the chocolate, a pile of brightly colored egg shells and lots and lots of hard boiled eggs.

WHAT ARE YOU GOING TO DO WITH ALL THOSE EGGS?
We love coloring eggs as much as anyone. But we HATE wasting food. What follows is a list of ten fabulous things to make with leftover eggs. Oh, by the way, you don't have to wait till Easter to enjoy these recipes.

  • Scotch Eggs (pictured right) -- Britain's favorite bar food makes a great snack, hot or cold.
  • Deviled Eggs (pictured top of this post) - Why wait till your next party to serve this great hors d'ouervre?
  • BBQ Eggs -- I know Bar-B-Q eggs may sound strange, but they are really delicious. Try them, you'll be surprised.
  • Pickled Eggs -- Another pub favorite!
  • Beet Pickled Eggs -- Brightly colored pub food. Yummm!
  • Egg Salad Sandwich -- A classic: egg salad spread it on bread, topped with lettuce and sliced tomato (pumpernickel bread is especially good).
  • Meatloaf -- Bury a few of hard boiled eggs in a meatloaf for a visual and taste surprise.
  • Potato Salad -- Bet you never think of this favorite picnic side dish until summer, but it makes a great way to use extra boiled eggs now.
  • Scalloped Eggs -- This is an old fashioned recipe that was a favorite in your grandmother's (or great grandmother's) day.
  • Cobb Salad (pictured right) -- Eggs add the perfect flavor touch to Hollywood's most famous salad.

Use Up That Leftover Easter Ham

Easter dinner is over and you've still got tons of ham left? Join the club, but don't despair. The recipes at the links below will help you use up every last but of that Easter ham, even the bones.

Wednesday, April 8, 2009

Make Your Own Salad Dressing -- Thrifty Thursdays

I never cease to be amazed at the amount of shelf (and in some cases cooler) space grocery stores devote to salad dressings. There's a never ending array. I almost never buy any of them. Why? because it's quick, easy, cheap and environmentally friendly to make my own. Not to mention healthier -- just try to find a salad dressing these days that doesn't contain high fructose corn syrup.

If you have a food processor or mini food processor it's ultra quick to make dressing. Otherwise, use a whisk and incorporate the oil in a thin stream while whisking into order to emulsify the oil into the other ingredients.

And don't forget, vinaigrette dressings can easily do double duty as marinades -- now there's another supermarket aisle that's way too big.

Check out these recipe and forgo the dressing aisle of the market, you'll save money and valuable resources.

Variations on Vinaigrettes

Favorite Homemade Salad Dressings

Low Fat Salad Dressings

Thrifty Thursdays is a blog event created by my fried Amanda Formaro from Amanda's Cookin' blog. I've agreed to participate, so look for a frugal themed post here each Thursday. In addition to reading my posts, be sure to visit Amanda's blog for a round-up of all the thrifty home and cooking tips and recipes that came in this week from folks around the blogosphere.

Friday, April 3, 2009

Get Ready for Easter Ham Tutorial

It's almost Easter and for many people that means it's time for an Easter Ham.

Ham-The Frugal Cook's Best Friend
Ham can be one of the best grocery bargains around. It feeds a crowd - a 10 pound bone in shank ham can easily feed 20 people -- making it perfect for large gatherings and parties. But even if you make ham just for the family, leftovers can be used in an infinite numbers of ways. They also freeze well for later use. Check your supermarket flyers for sales as hams are regularly offered at bargain rates. Around Easter time, a lot of stores use ham as a "lost leader" the same way they do with turkeys at Thanksgiving. Sometimes you can even get a totally free ham.

Ham can be confusing to many cooks. It's no wonder. The term "ham" can mean so many different things. Fresh ham, smoked ham, country ham, city ham, cured ham, ham hocks, fully cooked, partially cooked and uncooked hams. Where do you begin? A lot of otherwise great cooks are so clueless when it comes to ham, they regularly give up and buy prepared hams (often spiral sliced and nearly always exorbitantly priced), instead of preparing their own. Little do they know, making ham at home is not difficult, and it certainly doesn't need to be expensive.

In this post, we'll take the mystery out of ham, so you'll never be intimidated by this delicious meat again. For the purpose of this article, we are referring to the typical types of American hams. We'll leave gourmet imported hams like Serrano, Prosciutto and Pancetta for another article.

Ham Facts and Terminology

Ham - In the general sense, ham refers to the cut of meat that is the entire back portion of the leg of the hog from the shank to the hip. Usually ham is cured and/or smoked. Whole hams usually weigh between 8 to 18 pounds. Hams are also sold by halves - either the butt end (meaty but somewhat difficult to carve) or the shank end.

Fresh Ham - the back leg portion of the hog that has not been cured or smoked.

City Ham - Refers to the mass produced hams most commonly found in American supermarkets. City hams have usually been cured by injecting with a brine, and usually (but not always) smoking.

Curing - Hams can be wet or dry cured to preserve them and give flavor. The amount of time spent curing and the methods used will depend on the producer and the type of finished product desired.

Wet Curing - Most hams in American markets are cured by injection, in which a sweet/salty brine is injected into the ham. Some hams are cured by immersing them in a brine.

Dry Curing - The process used to make Country Ham, it involves salting the ham's surface and hanging it to dry for several months to several years until the salt permeates the meat. This type of ham requires no refrigeration until after it is cooked, providing it is stored in a cool dry place. Preparing and cooking a country ham requires extra steps not necessary for commercially prepared brined hams. Click here for details on preparing a Country or Smithfield Ham.

Smoking - Most, but not all, hams will go through a smoking process after curing. The flavors imparted to the meat will depend on the type of wood used for smoking.

Aging - Most supermarket hams are not aged, but gourmet hams usually are allowed to age - some as much as 2 years -- in order to develop their flavors.

Fully Cooked Ham - Has been heated to an internal temperature of at least 148° F. These hams require no further cooking and can be served hot or cold. Although you technically do not need to cook this ham, doing so will improve the texture and flavor of the finished product.

Partially Cooked Ham - Has that has been heated to at least 137° F, which kills the trichina parasite. This type of ham must be cooked before serving.

Uncooked Ham - Needs to be thoroughly cooked before eating.

Canned Hams - May be a whole piece of boneless ham or may be formed from small pieces of meat held together with a gelatin mixture. Read the label carefully to know what you are getting.

Smithfield Ham or Country Ham -- All country hams are dry cured with salt. If all you've ever experienced are the supermarket varieties of ham, a country ham may be an acquired taste. They are definitely more salty! But underneath the salt you'll get flavor and subtleties that other hams just can't compare to.

Think of the word "Smithfield" on the label as you would an appellation on a wine label - the ham comes from the area of Smithfield, Virginia. Originally the hogs that made Smithfield hams were fed a diet of acorns, hickory nuts (guess there's a reason we always see hickory smoked ham) and peanuts. Most Smithfield hogs today dine on a whole grain diet. The dry cured hams are aged from 6 months to 2 years, resulting in a dark rich meat that requires no refrigeration until cooked (provided it's kept in a cool, dry place).

Preparing and cooking a Smithfield, or any dry cured country ham requires extra steps not necessary for commercially prepared brined hams. Our Smithfield Ham tutorial will show you what to do.

Ham Cooking Times and Temperatures
In general terms figure about 10 minutes per pound for baked ham (baked at about 325° F.).

Cook ham to an internal temperature of 135° - 140° F.

If you plan on glazing your ham, bake the ham, without glaze, to an internal temperature of 130° F; apply glaze and continue baking until done.

Ham Tips

  • A bone in ham will yield better flavor than a boneless ham.
  • Don't throw out the bone! After you've eaten as much meat as the family can handle (it doesn't hurt to leave a little on the bone) you've got the makings of a great pot of beans or soup.
  • As a general rule of thumb, ham produced for the mass market will be lightly smoked or not at all. The more expensive and "gourmet" the ham, the heavier the smoky flavor.
  • Add more smoky flavor to your "city" ham by cooking it in a covered grill (gas or charcoal) under medium indirect heat. Add some soaked wood chips to the indirect heat source for additional flavor and subtle variations - hickory works well.
  • Let It Rest! - Let baked ham rest for 20 to 30 minutes before carving. This step allows the ham to complete cooking (the temperature will rise another 3-5 degrees after leaving the oven) and gives the juices time to be re-absorbed into the meat.
Favorite Main Course Ham Recipes

Wednesday, April 1, 2009

Make Your Own Coffeehouse Style Drinks - Thrifty Thursdays

I love coffeehouse style drinks -- lattes, cappuccinos, even the occasional mocha. But buying these little treats is expensive! Just two coffee house beverages per week at a modest $3.50 will set you back a whopping $364.00 over the course of a year, not counting tax, tips, or extras like biscotti to dip in the drinks. You could buy a decent cappuccino machine for that price and make as many coffee house beverages as you like, complete with professionally frothed milk. You can get a passable machine that does the same for much, much less.

If you enjoy coffee house coffee and drinks you can save yourself a ton of bucks by investing once in a decent espresso machine. This one important purchase will provide years of sipping enjoyment. It's also elegant and impressive to conclude special dinner parties by serving your guests espresso, cappuccino, latte or other coffee house favorites.

Those on a really tight budget can get by with a Moka Pot for under twenty bucks (no frothed milk though) to make their espresso.

Click here to check out the espresso and cappuccino deals at Amazon.com.

Below are some of the most popular espresso based coffee drinks and how to make them:

Espresso
A rich, thick coffee brewed by forcing water through very fine coffee grounds. A perfect cup of espresso will be rich and dark and topped with a thick layer of "crema." Despite the fact that its name implies dairy, crema on espresso has nothing whatsoever to do with actual cream or milk. Crema is the layer of foam that forms at the end of the espresso brewing process and can only be achieved by brewing with a high-pressure brewing method such as an espresso machine or moka pot.

Espresso Macchiato is a cup of espresso dolloped with a spoonful of the foam from steamed milk.

Cappuccino
Cappuccino (pictured top of this post) is a shot (or two or three) of espresso, mixed with steamed milk and topped with the a head of frothy foam from the steamed milk. Most espresso machines have a the capabilities of steaming milk, either with or without foam. Follow your machine's instructions. You are trying to achieve scalded (but never boiled) milk that is mixed generously with foam. For the proper consistency, the milk will have doubled in volume during the steaming process. Although it's not authentic Italian, Americans like to top their espressos with a dash of cinnamon.

Café Latte
A Latte (pictured right) is a cup of one part coffee to 3 parts heated or steamed milk (no foam).

Cafe Mocha
Add a squirt of chocolate syrup to the basic Cafe Latte recipe, then top with whipped cream, and you've got a delicious Cafe Mocha.

Latte Macchiato
is a cup of steamed milk accented with a small dash of brewed espresso.

Favorite Coffee Drink Recipes
These recipes can help you get creative with your coffee at home and visit the local coffee house a lot less.

  • Caffe Shakerato con Ciocolotto (pictured right) -- This popular Italian coffee bar drink takes shape when espresso and chocolate syrup are shaken with cracked ice and a bit of sugar.
  • Mayan Iced Coffee -- A refreshing summertime coffee drink that's also diabetic friendly.
  • Iced Black Coffee with Lemon Peel -- Here's a unique refreshing twist on iced coffee -- serve it black with a twist of lemon peel and sweeten to your liking (or not). The drink is popular during the summer in Coastal Spain.
Coffee Accouterments and Accessories
Thrifty Thursdays is a blog event created by my fried Amanda Formaro from Amanda's Cookin' blog. I've agreed to participate, so look for a frugal themed post here each Thursday. In addition to reading my posts, be sure to visit Amanda's blog for a round-up of all the thrifty home and cooking tips and recipes that came in this week from folks around the blogosphere.